So, it's been cold here for the past several months. Like, really cold - too darn cold to do anything to my car. So it's just been sitting in the garage. Sigh.
I did make it to the London Cobra Show in June 2010 but not in my FFR. I went in our family car because the FFR wasn't ready. I won't be driving it this year either even if it is ready due to other obligations.
The weather has been nice for the past couple of days though and I've started tinkering about again. It appears that I need to pull the intake manifold as it's leaking oil at the rear seal and the thermostat housing is misting coolant. At least I can knock both of those out at one time and I hope I won't have to fool with them again.
In other news, I've ordered 4" Peep side mirrors from Speedway Motors and a hidden body mount kit from Breeze Automotive. I also made a bracket for the interior rear view mirror to mount it on top of the windshield instead of screwing it on to the body.
That's about it for now. Maybe I'll have updates worth posting in the near future. We'll see how Mother Nature treats me.
Thursday, February 17, 2011
Monday, May 31, 2010
Seats
My wife didn't like the stock low-back seats due to the risk of whiplash if we get rear-ended. Also, she says I snap her neck back when I accelerate hard. :innocent:
So I sold those and purchased a set of Cobra Clubman highback seats. Now the challenge is how to mount them.
The drivers side has to be adjustable so she can drive sometimes. I need the seat as far back as it will go while she needs it substantially forward to be able to reach the pedals. Luckily the passenger side can just be bolted in.
What to do?
UPDATE: I cheated. I ordered the Street Performer Seat Installation Kit from Breeze Automotive. I spent several weeks trying to make my own brackets and use the Mustang seat sliders and could never make them work.
So, my advice is, if you need to be able to move the seat fore and aft, just buy the brackets from Mark @ Breeze.
LCS or bust
In anticipation of attending the London Cobra Show I've been putting in long hours trying to get the car streetable. It won't be finished by any stretch but I'm hoping to get it put together enough to allow me to register and license it.
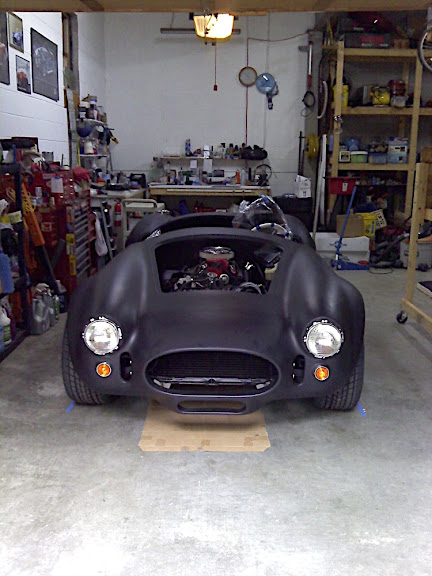
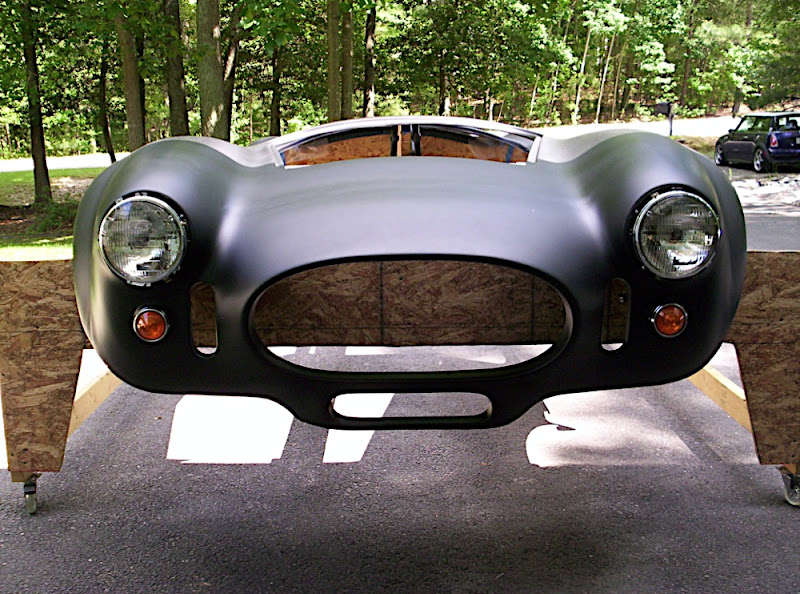
I mounted all of the lights to check fitment, made some adjustments, swore a bit, adjusted some more and came away with the knowledge that I'll have some serious body work to do before it gets paint.
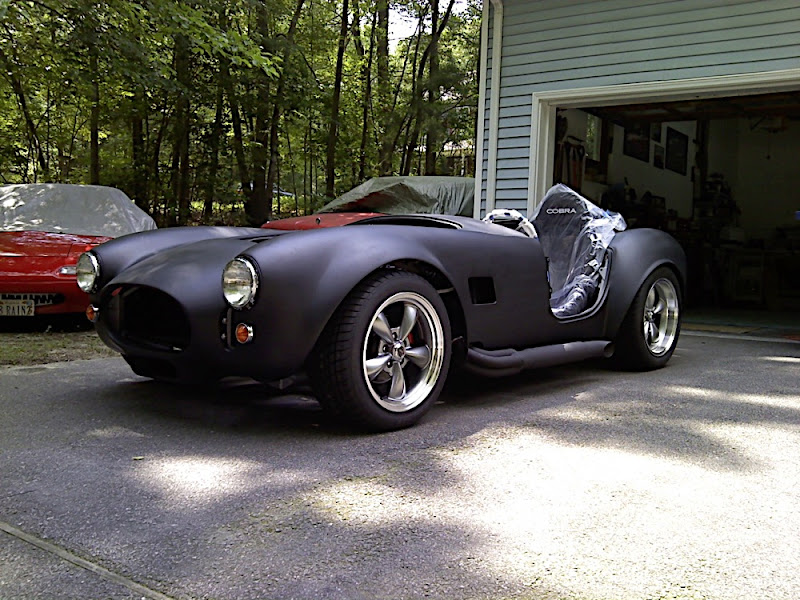
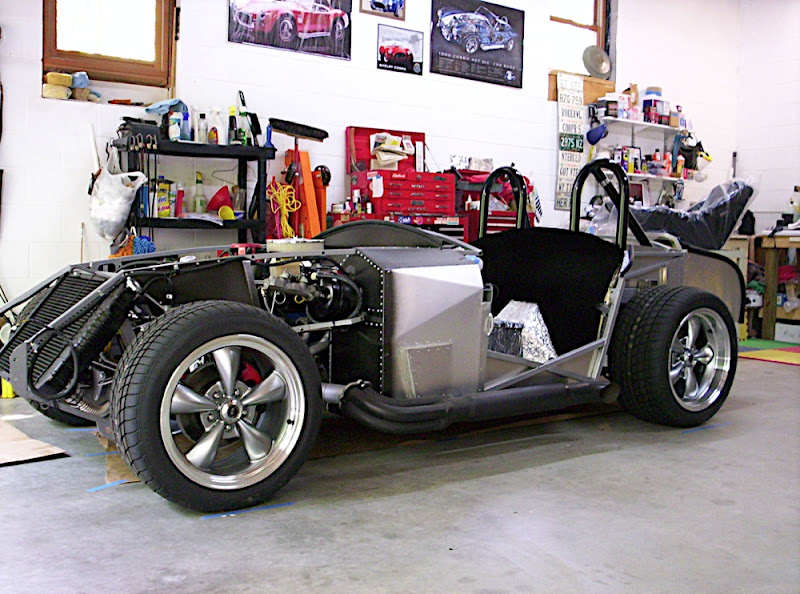
But I couldn't drive it with green stripes all over so I bought a quart of black sealer and shot it on the body. That one change made a dramatic difference in the appearance of the body. It has a sort of ratrod look from the satin finish. It won't stay that way too long but at least it's one color. It almost looks like a car with the lights back in.

I've been working on sound and heat insulation too. ERA Replicas recommends using Frost King HVAC duct insulation. If it's good enough for them, it's good enough for me. I've done the footboxes, rear cockpit wall and transmission hump. The floorboards will be done after I figure out where to mount my seats.
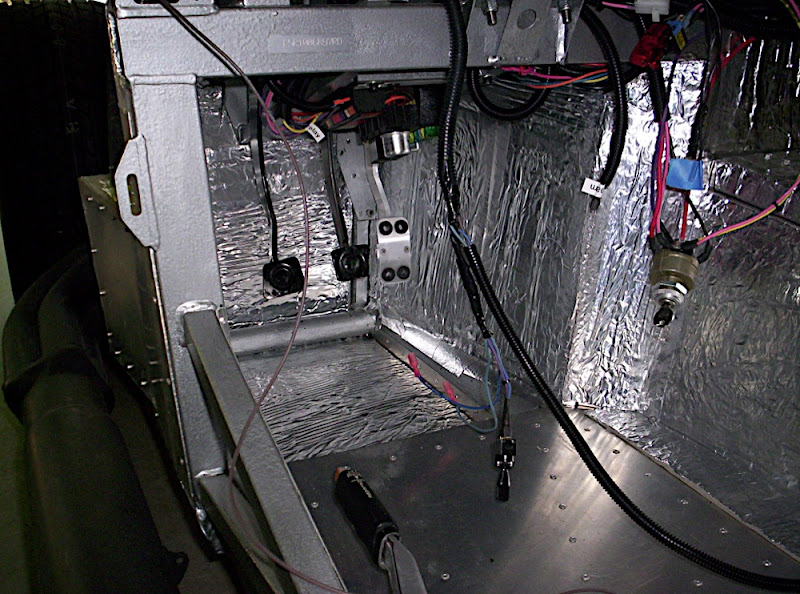
I also installed the first piece of carpet. :-D
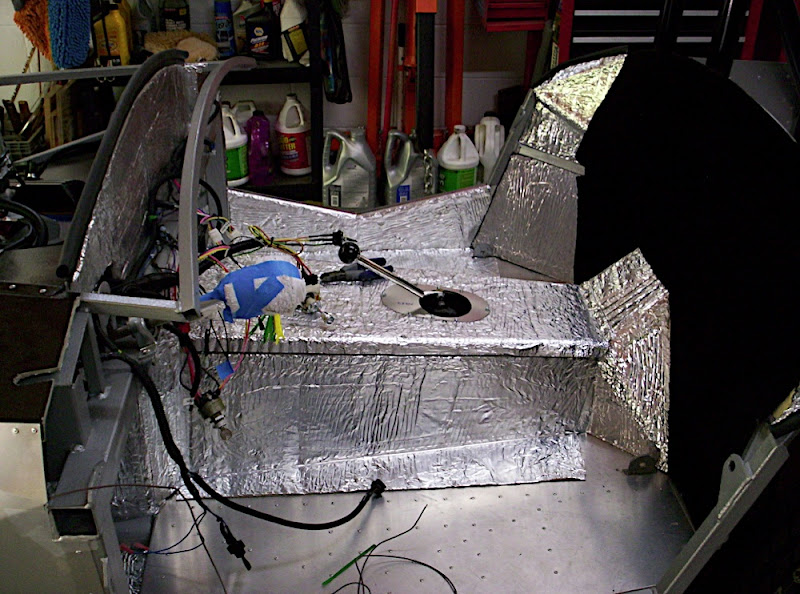
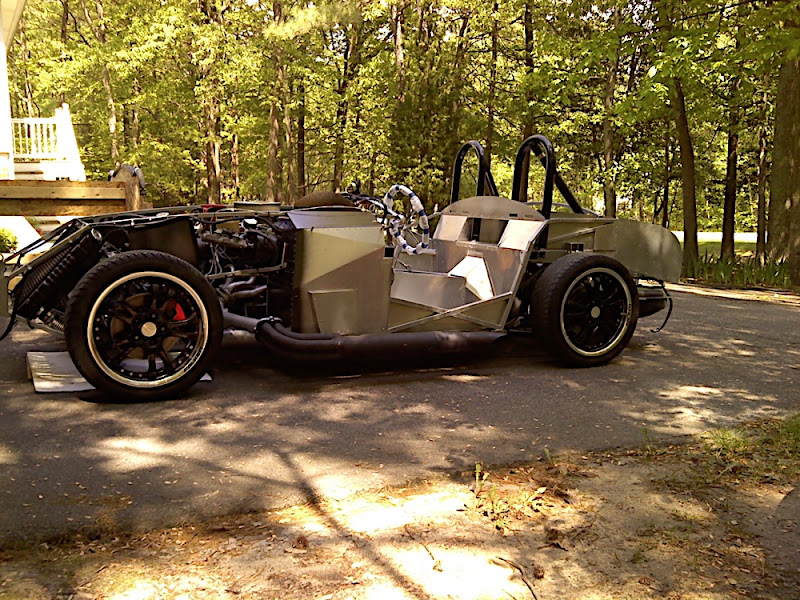
So this is how the car sits.
Will we make it to London? Who knows? Other life events may affect that decision. But I'm still going to try to have the car ready to go.
I mounted all of the lights to check fitment, made some adjustments, swore a bit, adjusted some more and came away with the knowledge that I'll have some serious body work to do before it gets paint.
But I couldn't drive it with green stripes all over so I bought a quart of black sealer and shot it on the body. That one change made a dramatic difference in the appearance of the body. It has a sort of ratrod look from the satin finish. It won't stay that way too long but at least it's one color. It almost looks like a car with the lights back in.
I've been working on sound and heat insulation too. ERA Replicas recommends using Frost King HVAC duct insulation. If it's good enough for them, it's good enough for me. I've done the footboxes, rear cockpit wall and transmission hump. The floorboards will be done after I figure out where to mount my seats.
I also installed the first piece of carpet. :-D
So this is how the car sits.
Will we make it to London? Who knows? Other life events may affect that decision. But I'm still going to try to have the car ready to go.
Body cutouts
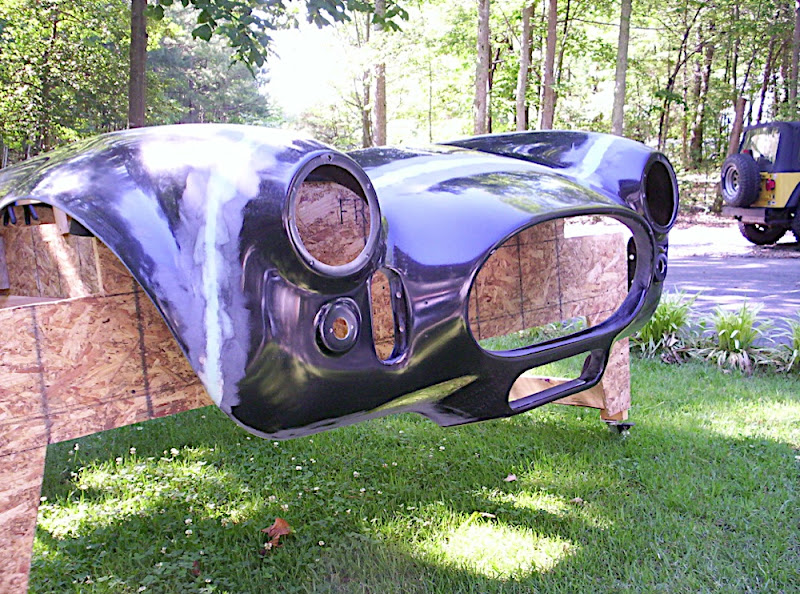
I finally worked up the nerve to do the body cutouts. I had heard horror stories of how inaccurate the cutouts were from the factory so I decided I would do them on my own. It also saved me $260.
It was a bit unnerving to take a hole saw to the car but I did it figuring I can fix it if (when?) I screw something up. Happily most everything turned out.
While I had the body upside down for the Herculiner, I cut the wheelwell lips and rounded those. They almost feel like rolled aluminum now.
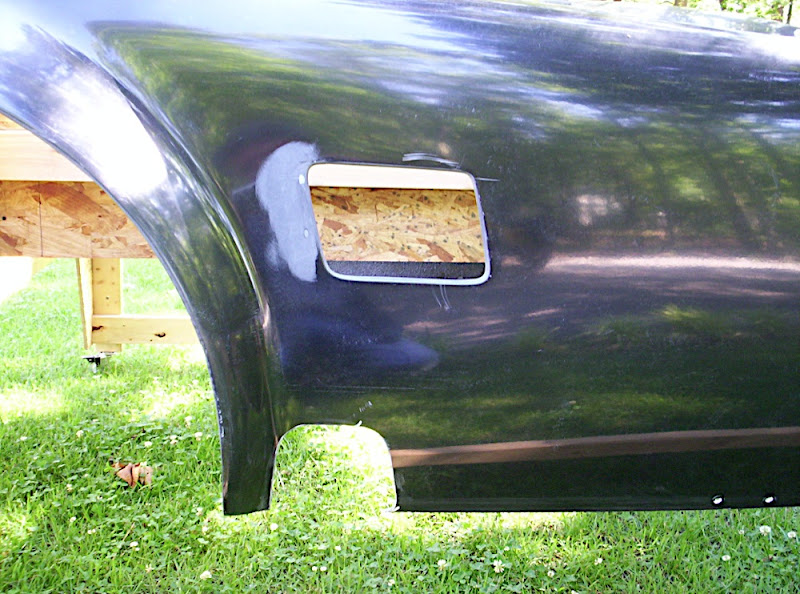
I also cut for the side vents and had no problems.
The exhaust and rollbar cutouts were a different story. FFR marks the body for us DIY cutters and stupidly I used their marks.
As a result one exhaust cutout is 0.5" forward of the other so I'll have to close that gap with some fibreglass at a later date.
The bigger issue is the rollbars. 5 holes were off by just a bit but they can be adjusted with a sanding disc and covered with a bezel. But the passenger side diagonal brace hole is just wrong. It was off to the rear by about an inch and too far to the right by another inch. But again, it's fibreglass so I can fix it. But you'd think after selling over 6000 of these kits they could mark the holes properly!
The marks of where to drill for the light mounting studs were also wrong and the screws for the taillights on one side are both at an angle. Again, I can fix it but still...
It was a bit unnerving to take a hole saw to the car but I did it figuring I can fix it if (when?) I screw something up. Happily most everything turned out.
While I had the body upside down for the Herculiner, I cut the wheelwell lips and rounded those. They almost feel like rolled aluminum now.
I also cut for the side vents and had no problems.
The exhaust and rollbar cutouts were a different story. FFR marks the body for us DIY cutters and stupidly I used their marks.
As a result one exhaust cutout is 0.5" forward of the other so I'll have to close that gap with some fibreglass at a later date.
The bigger issue is the rollbars. 5 holes were off by just a bit but they can be adjusted with a sanding disc and covered with a bezel. But the passenger side diagonal brace hole is just wrong. It was off to the rear by about an inch and too far to the right by another inch. But again, it's fibreglass so I can fix it. But you'd think after selling over 6000 of these kits they could mark the holes properly!
The marks of where to drill for the light mounting studs were also wrong and the screws for the taillights on one side are both at an angle. Again, I can fix it but still...
Gauges
I got my gauges recently. They came from Whitby Motorcars. They sell the Classic Instruments Classic Gauge set that includes the speedometer, tachometer, water temperature, oil pressure, voltmeter and fuel level gauges. I added a clock to fill the last hole in the dashboard.
When I started this build I told my wife that I one thing I had to have was a reverse reading speedometer and the Whitby kit has that. They're all electric gauges including the speedo. While this means I have to calibrate it, I won't have to change the drive gear in the transmission when I regear the rear axle - I just change some dip switches.
My workspace was the dining room table protected by an oh-so-stylish 101 Dalmatians blanket (my 21 and 25 year old sons don't want it any more for some reason.)
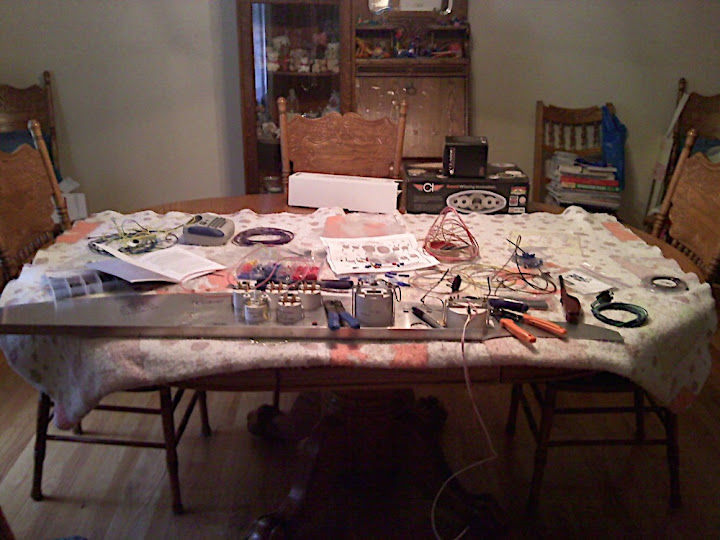
Everything went together smoothly. I used quick-disconnects in case I ever have to remove the dash. Yes, the gauges are wired together but the whole thing will unplug from the car without having to disconnect individual gauges.
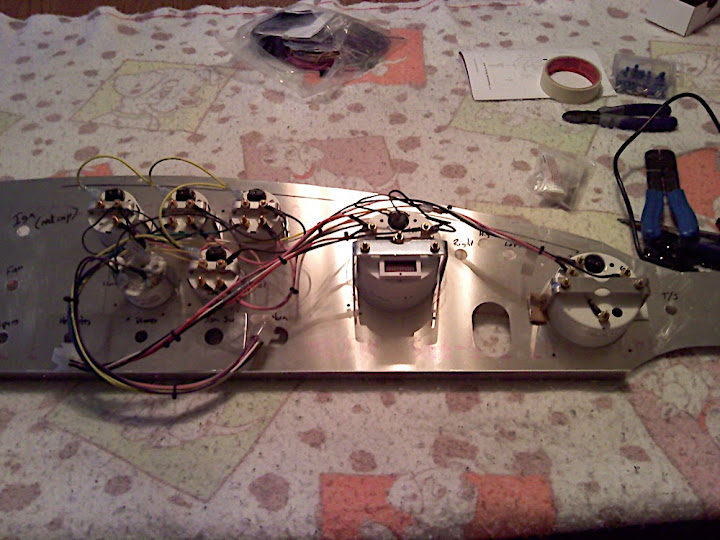
All connections were crimped, tested and shrinkwrapped. The speedometer and tachometer each have dedicated ground connections to the frame while the other gauges share their ground. Testing showed that everything worked.
Then I took it all apart so I could veneer the dash. I'm using a white oak veneer with a stain that comes close to the color of the steering wheel. Once the dash is finished and sanded I can put everything back together and install it into the car.
When I started this build I told my wife that I one thing I had to have was a reverse reading speedometer and the Whitby kit has that. They're all electric gauges including the speedo. While this means I have to calibrate it, I won't have to change the drive gear in the transmission when I regear the rear axle - I just change some dip switches.
My workspace was the dining room table protected by an oh-so-stylish 101 Dalmatians blanket (my 21 and 25 year old sons don't want it any more for some reason.)
Everything went together smoothly. I used quick-disconnects in case I ever have to remove the dash. Yes, the gauges are wired together but the whole thing will unplug from the car without having to disconnect individual gauges.
All connections were crimped, tested and shrinkwrapped. The speedometer and tachometer each have dedicated ground connections to the frame while the other gauges share their ground. Testing showed that everything worked.
Then I took it all apart so I could veneer the dash. I'm using a white oak veneer with a stain that comes close to the color of the steering wheel. Once the dash is finished and sanded I can put everything back together and install it into the car.
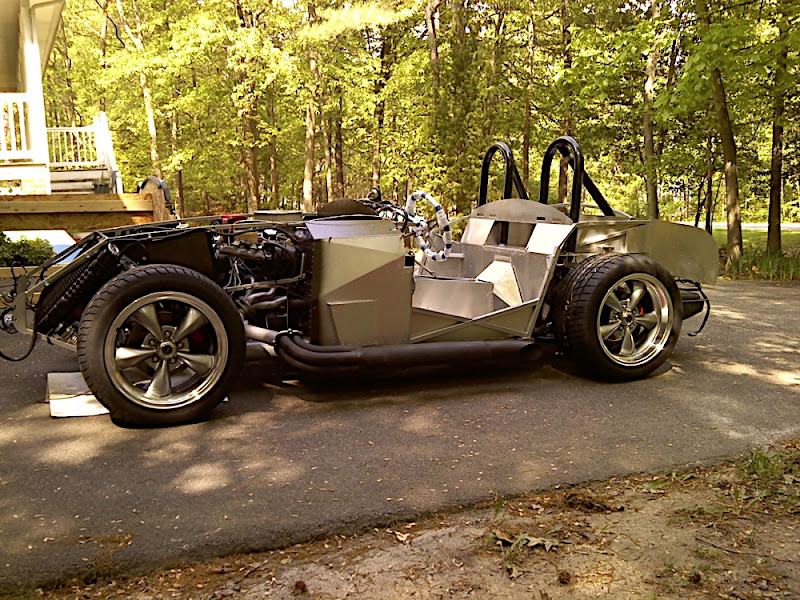
Wheels!!!
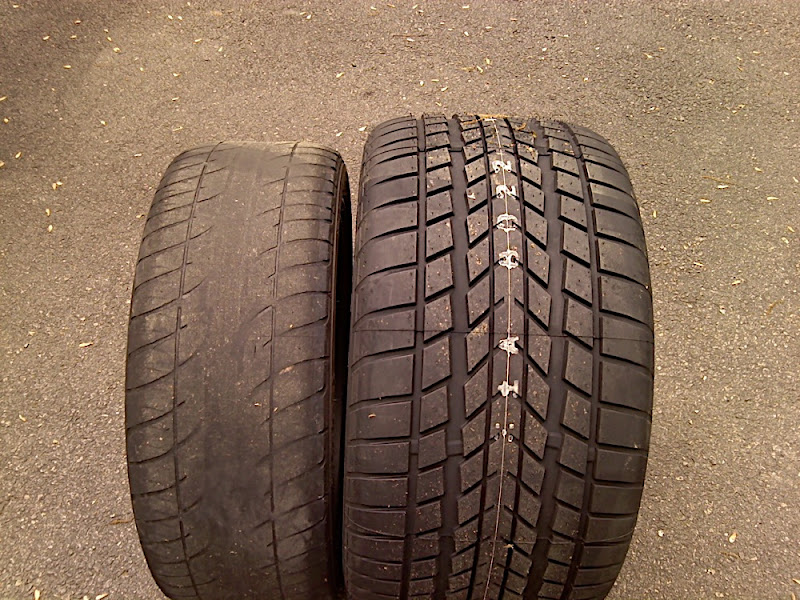
I've been using some extra wheels and tires to roll the chassis around during the build. They fit but they're too narrow and not the look I want for this car. Plus three of the tires are bald.
They actually belong to my youngest son but we put the stock wheels and some long-life tires on his car while he's in college. He can get the nice wheels back when he can buy some new tires.
Anyway, I finally found the wheels and tires I wanted. I ordered them from several places but it seemed that the rear wheels were on literal world backorder. Finally I found that Tire Rack had a set of American Racing Authentic Hot Rod wheels that were exactly what I wanted. They have polished lips and Anthracite spokes. The fronts are 17x9 with 245/45-17 Sumitomo HTR-Z tires. The rears are 315/35-17 HTR-Z on 17x10.5 wheels. They're a bit wider than the rollaround tires I'd been using.
I like them!
Subscribe to:
Posts (Atom)

